I’m not usually big on decorating for the Holidays {except Christmas}, but this year so far I really seem to be getting into it! Maybe it’s just having a little person around that makes it more fun. Anyways, whilst rummaging through all the Valentine’s stuff on Pinterest I came across this :
 |
| {The Peanut Paintshop} |
I didn’t really look into at the time, but I remembered it the last time we were at Hobb Lobbs and thought I’d pick on some wooden hearts & ribbon and just make my own version {I still wanted to find the picture/source for my inspiration though!} Looking at it now, it isn’t a DIY tutorial anyways – just showcasing some of their handywork which can be purchased for $9 a heart – so maybe check them out if you don’t want to make your own.
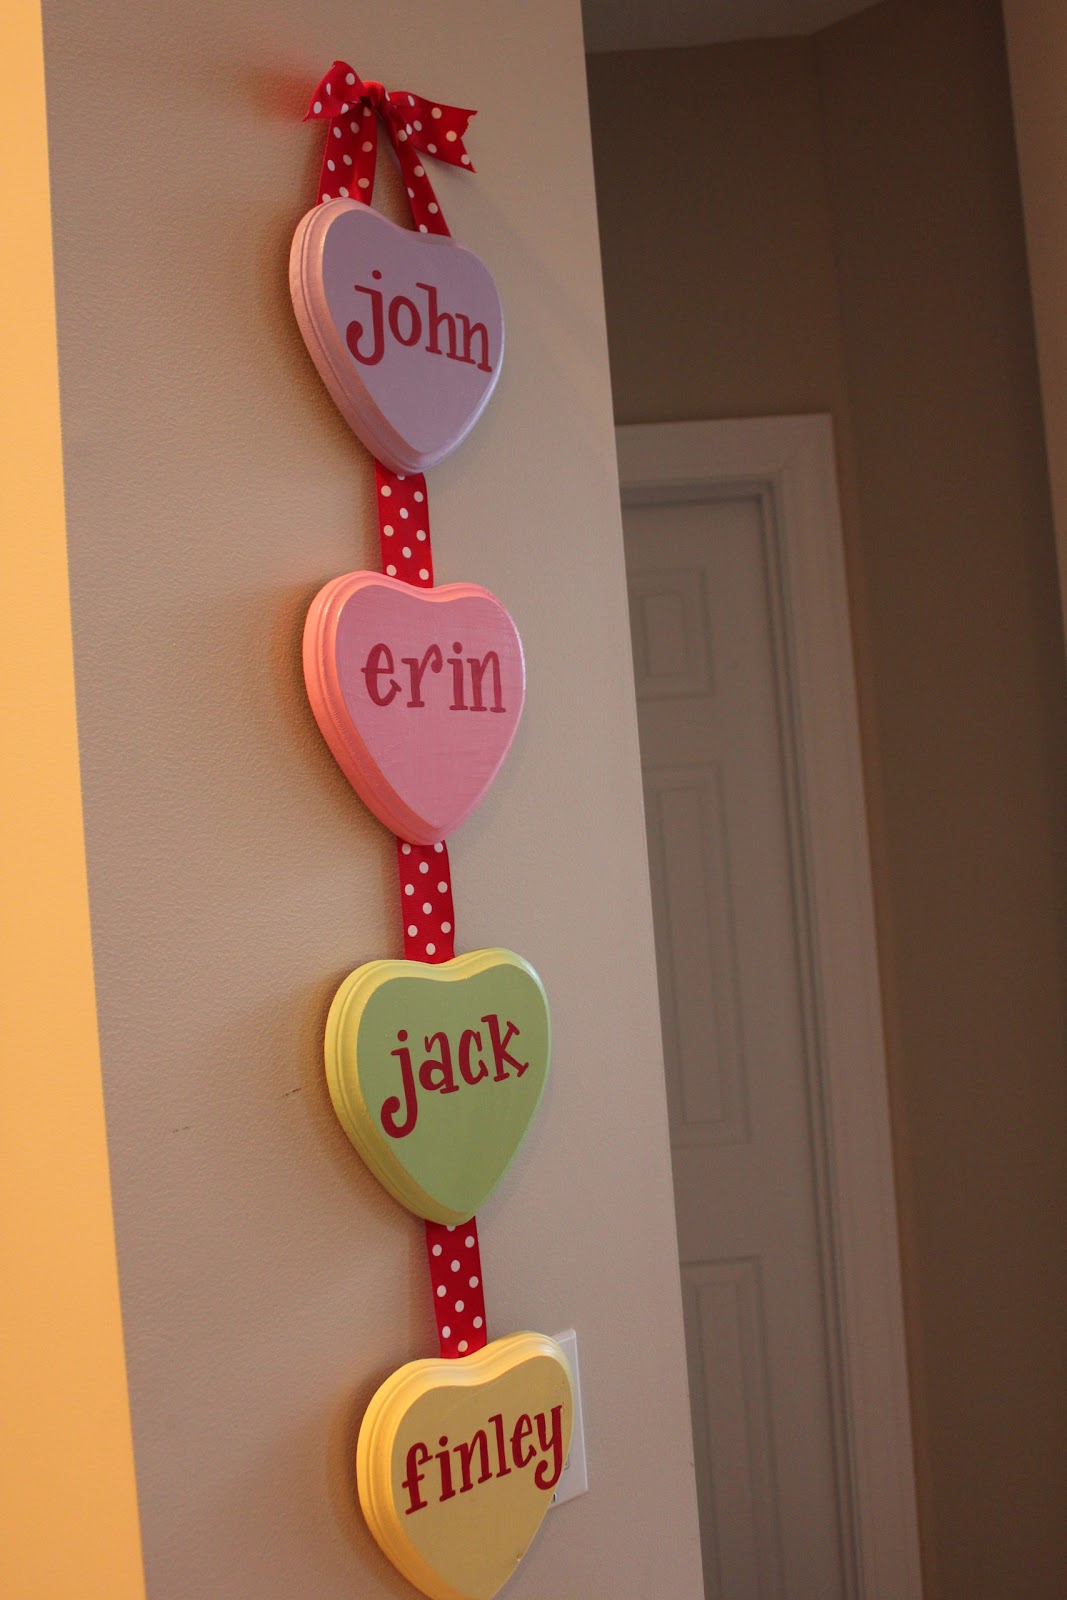
In case you don’t remember, this was our “decorating” of the window area for winter {observe cute “Let it Snow” plaque from my brother}

And then we made some cute Heart Garland and removed Mr. Snowman which void left beside the window. So we painted us up some hearts.

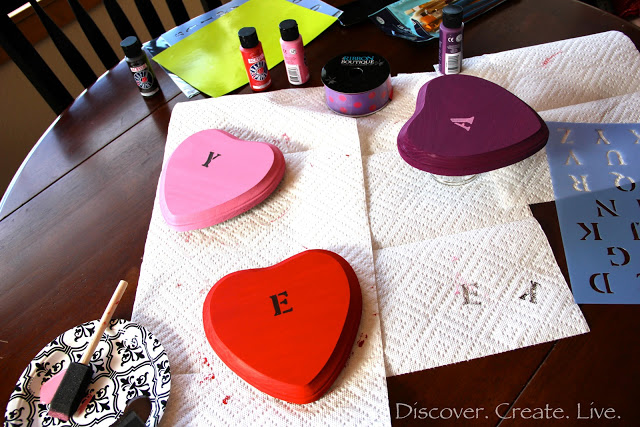
I found these at Hobby Lobby for $1.47 – there were smaller ones available for $0.98 {I think.}

We also picked out a color for each of the hearts as well as a color for the lettering. Wes surprised me by picking red {he’s usually more of a blue kinda guy.}
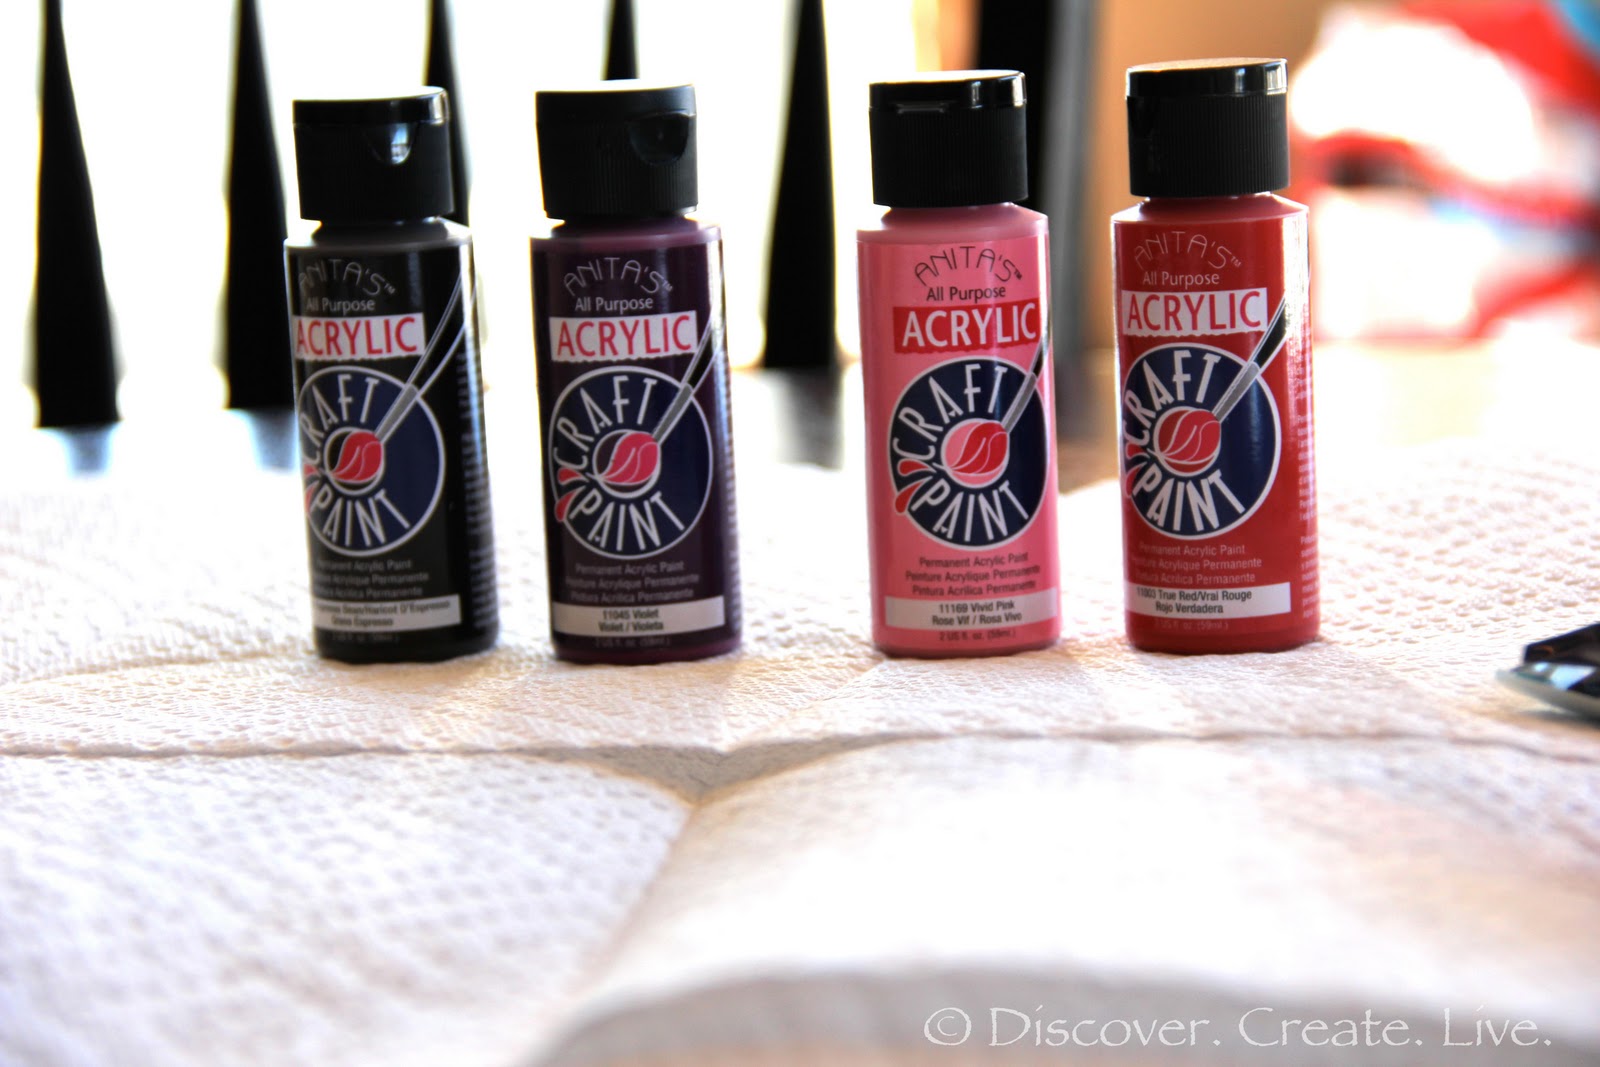 |
| Espresso, Violet, Vivid Pink, & True Red |
I also got a variety pack of brushes {I only ended up using the little foam brush though lol,} a stencil sheet, and reversible pink & purple polka-dotted ribbon.

To paint my hearts I simply squirted a big blob in the middle and then used a foam brush to spread it out evenly. I made sure to paint with the grain on the top of the hearts. Even with rinsing and drying the brush between each color, it only took about 10 minutes. I let them dry for about 30-45 minutes.
 |
| after one coat of paint |
The pink & red looked pretty good with one coat, but not so much the purple. Probably because that heart had some darker wood grain – so I did two coats on each of them. I let the second coat dry for about 2 hours {Probably didn’t need that long, I was just busy doing naptime}

To stencil I stared in the middle & worked my way out. Wes’s name has an odd number of letters so I started exactly in the center. I have an even number of letters so I stared to the “left-center” with ours. The lettering took a while longer because I need to let each letter dry before doing the next one so the stencil didn’t smudge it. – I probably could have done it faster free hand, but I specifically wanted the look of the stencils, so it was worth the extra time. Also, I was careful to wipe off the stencil after each letter because the paint comes off most easily when wet.
 |
| I ended up using pink on the purple heart, because I was afraid the espresso wouldn’t show up clearly enough |
You can’t see the wood grain this well in “real life,” but our fancy new camera captured it pretty well. After messing around with how I wanted to use the ribbon, I decided on a simple loop knot for each heart. I cut 1 foot of ribbon for each one.

I hope this picture makes sense – it’s kind of like tying a tie…
 |
| wrap the ribbon around itself and insert the end through the loop |
This knot gives you two “options” for display.
  |
| The two sides of the bow – I originally though I was going to use the side on the right, but I ended up liking the look of the knot side better 🙂 |
I used a regular 1″ nail and just hammered right through the middle of the ribbon tabs to the back of the hearts. – They were a little to long so I had to leave some of the nail sticking out, but it worked just fine.
 |
| notice the tiny nail hole from me hammering to far on the pink one?? |
Here’s a close up of how they look hung:


Oh my gosh. I just got the stuff to make these yesterday. Well, sort of, as Hobby Lobby only had 2 hearts so not quite as many as I need, but hopefully they'll have more soon?
That's awesome – great minds think alike! Hopefully they do :-/ I thought about doing the smaller ones at first but they didn't have enough so i went big – which turned out well – I guess they're popular now {gee I wonder why :P.} I'll keep an eye out too for ya 😉
That's wonderful. It's very possible that I have the small ones, but I obviously wouldn't have a problem having the big ones. Since I don't have enough for our whole family it doesn't matter. 😛 I'm totally blabbering now.
This is so cute! Love them! Makes me really hungry for those little message heart candies… 😉
Thanks! hehe – yes, those are so yummy – they were always one of my favorite holiday treats 🙂
Oh, those turned out so great! I think they look better than the example you got it from! And Hayden trying to grab the garland… so cute! 🙂
~Lisha
Well thanks! – Hayden has a tendency to make everything cuter 😛
Great job Kate!! We made a fun valentine craft the other day. We love any chance to decorate 🙂
thanks 🙂 I seem to be getting more and more into it